Updated July 17, 2025
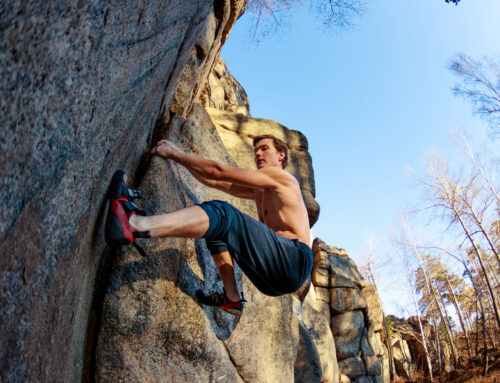
Rock climbing is a very gear centric sport, something you’ll learn very quickly when you start picking up your first bits of gear. It can be very overwhelming and difficult to navigate on a budget. For this reason I recommend prioritizing your purchases; build up your rack as you progress and need more of the essential rock climbing gear that’ll form your lifeline in the sport.
Luckily, I’ve already been through the turmoil of figuring this all out and now I’m here to pass my knowledge on to you. Consider me your relationship coach, here to guide you through the milestones of your new love affair.
The First Date — Staple Rock Climbing Gear to Get You Started
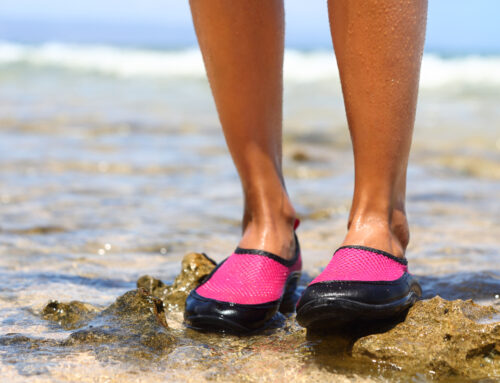
Climbing Shoes
Climbing shoes come in all shapes and sizes and you’ll evidently experiment with the different shapes and sizes they come in. Your first upgrade, from smelly slippery rentals, should feel like they’ve changed the game. They truly are a gear essential for anyone who wants to go rock climbing regularly. Luckily near any shoe will feel better than those floppy clown shoes you’ve been renting, but I have got a few pointers for choosing your first pair.
Folks will tell you not to buy aggressive shoes when you’re starting, but don’t listen to them. Get shoes that will complement the style of climbing you like or want to get into. The closer to horizontal you like the climb the more downturned you might enjoy your shoes. This is not to say you can’t power through steep overhangs in the likes of the FiveTen’s Anasazis. If Chris Sharma can send V15 in them they probably won’t hold you back.
Go to stores and try shoes on, sometimes shoes just don’t suit your feet. For example there are brands that I avoid because the toe box never fits. Try lots of shoes on, and you might find the same thing. However, it can be tricky to know what to do once you’ve got a shoe on your foot, how do you know it’s right for you? Well, stores that stock climbing shoes usually have some small holds you can stand on, while gym stores are usually kind enough to let you climb a couple of routes in them.
You should check that 1) The heel is snug and not baggy 2) All your toes are at the end of the shoe 3) That the closure system is sufficiently tight. They should fit like a glove with no wiggle room. To test the shoes, I try to stand on a diverse range of holds in the route allowance. This will include inside and outside edging on a small hold, and volume smearing. This is usually achievable in one climb if you find the right slab set. I then take them over to an overhang to test the downturn as well as heel and toe hook abilities. The best routes for this will include moves that leave you quite stretched out and begging your shoes to help with the body tension. Try your best to avoid cutting loose — you’re here to test shoes not show off.
Chalk
For most people chalk is an essential bit of rock climbing gear. Sweaty hands and slipping on crimps is a nightmare. Plus, you really don’t want to be that weirdo that’s constantly borrowing other people’s chalk and communal chalk is a little gross. You’re going to get overwhelmed by choice, so I’m here to cut through the nonsense and let you know what’s up.
Firstly, you’re going to need a bag to store your chalk in. This can be a boulder bucket or a small chalk bag, but either way it’s a fleece-lined way of keeping your chalk in more than a ziplock bag. If you’re a route climber and like the ropes then I recommend getting something small and light that you can wear while you climb, like Organic Climbing’s Chalk Bag, Metolius’s Access Fund Bag, or this beauty from Static Climbing. However, you’ve probably noticed boulderers like to carry around ungodly amounts of chalk and blow their fingers constantly, all of which is made possible by big burly chalk buckets. Personally I like them with a little pocket for my phone, nail clippers, and maybe even a little snack. Which is why the ‘buckets’ from Black Diamond, Organic Climbing, Static Climbing and DMM are all great options.
Moving on to the good white powder we love so much: Chalk comes in a shocking number of varieties, and companies are eager to tell you all about their premium brand extra-drying-very-super-excellent-goodtime-chalk. I’ve used a whole host of brands and types and I’ll be 100% honest with you — they’re all exactly the same. There is, however, a personal preference you’ll have to work out for yourself regarding the coarseness of the chalk and the medium you wish you consume it from.
Loose chalk can be found in a range of grits and Friction Labs offers a good spread with Fine, Chunky, and Super Chunky options. However, you could buy a block and crunch it up in your bag yourself and cut out the middle man. I usually go for the Metolius Block, but I will admit their loose chalk is more convenient. Liquid chalk is currently all the rage since it has alcohol which acts as a gnarly disinfectant, but the alcohol will dry out your skin. There are too many choices in this department, Friction Labs, Metolius, Black Diamond, Petzl, and Mammut just to name a few. The last option is to buy a chalk sock/ball. This is a fabric cover which allows the chalk to escape and cover your hands as you squeeze it, but stops big spills. I recommend getting a refillable one as it’s way more eco.
So You’re Together — Getting Roped in Further
At this point you’ve been bouldering or route climbing for a while and you’ve sorted your rock climbing gear basics in the form of shoes and chalk. But, those big tall walls you keep seeing were calling your name and after a couple of tasters you know you need to invest in your own rock climbing gear. Safety Advice: Anything that is designed to take weight must have an UIAA and EN certification, these are essential tasting bodies that ensure your equipment will keep you safe.
Harness
The Harness is possibly the most important and essential bit of gear you’re going to need to take your rock climbing to higher levels. Your first harness should be a do-all go-to; get it right and you won’t have to worry about a new one for years. Before we start we should clear up what a harness looks like and what everything is called, to avoid any confusion.
- Belay Loop: A strong load bearing attachment point. Used for belaying and attaching yourself to anchors and ropes.
- Tie-in Points: These loops are what you’ll tie into before your climb.
- Waist buckle: This tightens the harness to stop it slipping up and down, and can come with either 1 or 2.
- Waist belt: This is what will be catching you in a fall, it should be snug around your waist with no possibility of you sliding out of it in any direction of fall.
- Leg Loops: These make the harness way more comfortable allowing you to sit in your harness like a seat and not rise up to your chest and start suffocating you. They come in adjustable or one size fits all, but do not need to be too tight, if you can tuck your fingers between them and your leg that’s fine.
- Gear Loops: These are a big consideration, it’s where you’ll clip carabiners and gear to. You want them to be in comfortable easy to reach places and stiff so clipping stuff to them is easy to do single handed. Some harnesses will have stiff front loops and soft rear loops which is all personal preference.
- Risers: These adjust the way your leg loops hang and hold them in place. It’s best to move these around to find your most comfortable fit when you’re sitting in the harness.
- Haul Loop (not shown): Located on the back center of the waist loop. A haul line is attached as an extra rope to drag your bags up the climb.
In my opinion, the best all round beginner harnesses will have a padded waist belt, adjustable leg loops, 4 to 5 gear loops, 1 belay loop, adjustable risers, and a haul loop. This gives you a nice comfortable start that you can do nearly everything in. From simple single climb crags to big multi-pitch adventures, you can even use it for via ferrata and scrambling.
The fit: Harnesses have decent size allowances. Your wait size should be somewhere between the upper and lower limits. So you’ll be safe on those days where you’re all layered up or going tops off for power. When you’re trying on harnesses consider the symmetry of the gear loops, as single buckle harnesses can be lopsided once tight. If you can, try before you buy, sit in the harness and make sure nothing digs in or pinches. Finally, they come in Women’s and Men’s models, so watch out you don’t get them mixed up as it can get pretty uncomfortable.
For these reasons I went with a Petzl Adjama, which has since been updated and is even better now. Other options include Black Diamond’s Momentum which comes in upgraded 3S and 4S models, and DMM’s viper for men and vixen for women.
Belay Plate and Carabiner
The belay device is another essential tool in your rock climbing gear quiver. Decisions need to be made, but it’s a hard one to make when you’re just starting out. However, there is one decision which is not as difficult to make, and that’s the carabiner you want to get. While there is a lot of choice there isn’t really that much to it.
You need a locking HMS carabiner which can be recognized by its distinct pear shape. Additionally you may want your belay ‘biner to have a keep on the narrow side. This traps your belay loop and prevents cross loading the carabiner. Strong, durable, and heavy should also be considered and as such I strongly recommend DMM’s Ceros which also comes in a Quicklock version for added safety. Other good options also include Edelrid’s Bulletproof HMS Screw-gate, Black Diamond’s Gridlock Screw-gate, and Wild Country’s Accent Light.
Before we talk belay devices it is probably worth mentioning the Munter Hitch; a knot that can replace your belay device in a pinch. Learn it: It just might save your life one day. Moving swiftly on to the belay device itself, this will be your go to rappelling and belaying tool, and your choices are straight forward:
Standard Tubular ATC
- Description: These devices build off old school sticht plates to increase the friction and heat dissipation. I recommend always carrying one of these as an emergency backup. The ATC can be used for all climbing, but they excel in the gym and at single pitch crags.
- Advantages: Can be used with a variety of rope diameters, light weight, and can accompany 2 ropes at a time for double stranded rappelling and half/twin rope belaying.
- Disadvantages: Can be too slow and have too much friction for lighter climbers and very thick ropes and does not offer an assisted braking mode.
- Recommendations: Petzl Verso, Black Diamond ATC, CAMP Shell, and Grivel Master.
Guide Mode ATC
- Description: The guide mode ATC is often an essential in rock climbing gear, used in nearly every discipline for its versatility in belay stances, rappelling techniques, and incorporation in rescue and hauling rigs. I recommend getting one of these as your first device as it provides you with the tools to take your climbing further, without dishing out more cash.
- Advantages: The additional versatility of assisted braking in guide mode for specific scenarios with the same additional flexibility of the regular ATC.
- Disadvantages: Similar high friction problems for lighter climbers.
- Recommendations: Petzl Reverso, Black Diamond ATC Guide, DMM Pivot, and Wild Country Pro Guide.
Assisted Braking Device
- Description: Though controversial for many years due to its use of moving parts it is now a widely accepted essential in any rock climbing gear bag. It makes for easily controllable descents often featuring an ergonomic handle.
- Advantages: Provides a margin for error for beginners,
- Disadvantages: Only takes one rope, moving parts are more likely to fail, and requires practice to feed rope out.
- Recommendations: Petzl GriGri, Beal Birdy, and Madrock Lifeguard.
Rope
Finally, the life saving noodle - Rope. This essential bit of rock climbing gear will be your life line so make it a good one. You need a dynamic rope to prevent any shock loading which is not a good time. You also need a rope that is within the diameter recommendations for your specific belay device. It should also say it is a single rope, meaning it is rated to be used all alone. I recommend getting a burly gym rope and staying above 9.8mm. Petzl’s Mambo at 10.1mm, Black Diamond’s 9.9mm, or Mammut’s Gym Workhorse at 9.9mm are all good options. Minimum length will depend on the height of the walls at your gym. If you’re planning outdoor use 60m is a good do-all length.
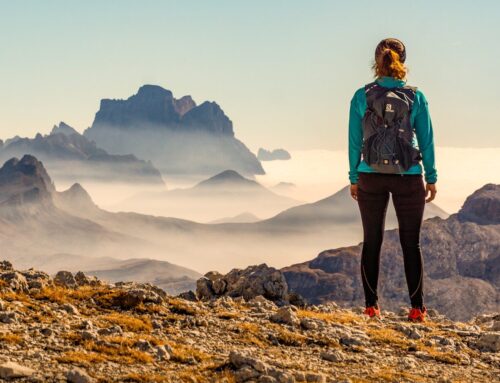
Getting Outdoors
Transitioning from your plastic pulling to outdoor climbing is a big step. Just like when you first arrived at the climbing gym there’s a new list of essential rock climbing gear. Your move to the outdoors can seem scary, but it can be tamed by an experienced friend or instructor. You’ll naturally be borrowing most of your equipment to start off, but as you grow into a cool-headed, competent climber your rack will grow with you.
Why buy gear when you can just borrow your mates? Well it’s simple really - Knowing where your gear has been and how it’s been used is far more confidence inspiring. In fact knowing how to spot obviously worn-out gear is as important as saying ‘no’ to the old geezer at the crag that keeps offering to hip belay you.
Your Guide to Essential Outdoor Rock Climbing Gear
The best way to confidently learn is to hire a guide. They’ll teach you the basics and make sure you have a great and safe day out. You’ll notice your guide probably looks well kitted out compared to you. His rack dangling around his waist and plenty of ropes strapped to the top of his pack. However, you too, can look just like him. Some of these you can pick up straight away, however, others it can be best to wait till you know how to use them.
Tying the Knot with Your Belay Partner — Exploring the Great Outdoors
Outdoor climbing comes in three varieties each with different gear requirements. Bouldering - the art of being too scared of heights to commit to the ropes. All the while, having an overwhelming urge to assert your dominance on some unsuspecting rock. Sport Climbing - Climbing hard without the faff, no silly fiddling with equipment, just pure rock and roll. Traditional Climbing (Trad) - The most poetic type of climbing where you place your own protection, naturally justifying the $239.95 you spent on a single number 8 Camelot.
Crash Pads
- Types of climbing: Bouldering and Traditional
- Description: A foam filled mat, typically with backpack style carrying system. Essentially it’s a portable mattress
- Purpose/Use: Used to cushion falling to the ground just like in the gym. This can help trad climbing when the first placement is further off the ground than is comfortable
Buying guide: There are a few things to consider when choosing a crash pad.
Size - Do not pick a pad that doesn’t fit in your car. There is nothing worse than desperately tying it to the roof of your car. However, a bigger pad means more coverage and is easier to aim for when falling, so pick according to your needs.
Foam - The foam in most pads is going to be adequate, however I have found some more comfortable than others. Thicker pads typically have more cushioning and don’t wear out as fast. Whereas, thin pads are much firmer and less forgiving on bad landings.
Style - There are 2 distinct styles of crash pad. Tacos and Sandwiches: Which refer to the style that the pad folds. Sandwiches fold nicer as they are 2 mats sewn together on one edge. These usually slot nicely into the back of your car. However, the risk of stepping right in the middle and spraining an ankle is there. Tacos, on the other hand, are one big pad you’ve forced in half leaving this strange space inside the mat; great for shoving your chalk and shoes though, so it’s not all bad.
Recommendations:
| Value | Metolius Party Pit | This budget pad is fine for most of your bouldering needs, although firm it makes a world of difference compared to falling into the ground. |
| Basic | Mad Rock Mad Pad | Although the same size as the party pit, an extra inch of padding offers some added confidence on those taller walls and longer falls. |
| Large | Black Diamond Mondo | Moving onto large coverage for those uncertain landing zones, this big 44″ by 65″ mat will have you covered. Although, bigger pads are harder to carry. |
| Fancy | Petzl Cirro | Rivaling the Mondo for size, this pad has a cover that protects the straps and carrying side from the mud and dirt, so you can stay clean carrying it. |
| Wide | Mad Rock Triple Mad Pad | Why go for a pad with one fold when you can have one with 2? Although not much bigger than the larger pads, it is more compact - Good for small cars. |
Helmet
- Types of climbing: Sport and Traditional
- Description: These come in 2 types - Hard shell and impact absorbing foam. Rated for a top down impact, it’s no good on your bike, just as your bike helmet is too holey for falling rocks. But it goes without saying this is an essential piece of gear for your rock climbing endeavors
- Purpose/Use: Protecting your skull from falling rocks and big knocks
Buying Guide:
Trying to find a helmet you look good in is near impossible, however there’s nothing cooler than safety. So bite the bullet and get one. I’ve heard too many stories of kids throwing rocks off cliffs onto unsuspecting climbers, and seen too many people invert and swing their heads into the wall to not wear one.
If you’re just starting out, get something with a hard shell. They are real do-all helmets and feel indestructible, so you can bash them about and still be fine. Unfortunately, the foam helmets aren’t built this way, they’re made to save you from one bed event and then they need replacing, which is rather pricey if you’re accident prone, or push it too hard into your pack. Top Tip: Get a light bright color, you don’t not want to be standing in the sun with a black helmet absorbing all the heat, trust me.
Recommendations:
| Helmet | Type | Comments |
|---|---|---|
| Black Diamond Half Dome plus Additional colors | Hard shell | A classic helmet choice which features adjustable sizing and straps. However, unlike the other options from black diamond this is not rated for side impacts. |
| Edelrid Madillo | Hard shell | It folds making it oddly packable. Honestly, this is revolutionary, I cannot express how much I hate trying to get my helmet into my bag only to have it waste valuable space. |
| Petzl Boreo | Hybrid | This foam helmet has a decent hard shell cover making it super durable against all those little bumps. |
| Black Diamond Vision | Hybrid | Similar to the Boreo this has a hard top to stop those pesky pebbles that your partner slipped on from ruining the structural integrity of your helmet. |
| Trango Halo | Foam | This foam helmet will protect your noggin, but is unlikely to be as durable as the hybrids. |
| Black Diamond Vapour | Foam | As with all foam helmets this is a favorite for those trying to shed weight, without compromising on safety, it also comes in light colors and lots of vents to reduce head sweat. |
Quickdraws
- Types of climbing: Sport and Traditional
- Description: Made up of 2 carabiners connected by thick webbing. This webbing is often called a dogbone
- Purpose/Use: Connects the climbing rope to the protection on a rockface, which the climber then falls onto
Buying Guide:
Quickdraws can be broken down into 2 parts, the carabiners and the dogbone. The carabiners can be either solid gate or wire gates, which typically affects the weight and price. However, people have preferences and there is some consensus that wire gates are easier to handle, but solid gates are more robust and diverse. Honestly, I have not noticed any difference and can clip either just fine. Top Tip: Have different colors for your rock side and rope side carabiners.
The dogbone is a different story. Traditional climbing requires carrying lots of gear and fitting it on your rack can be tough, but not as tough as the climb will get if you don’t watch your weight. Dogbones come in skinnier-thinner sizes for traditional climbing. They’re still super strong and perfectly reasonable for sport climbing too, but they will wear out faster. Sport climbing dogbones are thick and burly, built to take fall after fall, and if you’ve got the guns there’s nothing stopping you from using them on your stoppers. So you’ve really got to ask yourself, what type of climbing am I more likely to do? and do I fall a lot?
Finally there’s the matter of size: Yes size matters. You’ll want a variety of lengths for traditional climbing, and you’ll want to avoid short and stubby draws. They just add to the rope drag and make for a bad time, unless equipped with those funny pulley carabiners. I never leave the ground with anything less than 18cm. Although, it is a pain that most multi-packs are shorter.
Recommendations:
| Quickdraw | Intended Climbing | Size | Carabiner | Comment |
|---|---|---|---|---|
| Camp Dyon Express KS Quickdraw | Sport | 18cm | Wire Gate | A decent length in a multibuy is difficult to come by, so these draws from camp are a good find. Plus they feature color coordinated carabiners to stop micro-abrasions hurting your ropes. Another solid feature is the key-nose component to reduce snagging on hangers and protection. |
| Camp Photon Express KS Quickdraw | Sport | 18cm | Solid Gate | Similar to the Dyon, these are a solid gate alternative. This is reflected in the price. |
| Camp Photon Wire Express KS Quickdraw | Trad | 18cm | Wire Gate | CAMP have somehow managed to win me over during this search, they’re well priced and well sized quickdraws seem to be perfect for first time buyers. |
| DMM Spectre 2 Quickdraw | Trad | 18cm | Wire Gate | I use these draws and I honestly love them. DMM is my go to brand for most of my hardware and their 18cm trad dogbones are my personal favorite. |
| Black Diamond MiniWire Alpine Quickdraw | Trad | 60cm | Wire Gate | These extenders are super useful for those far off placements and I refuse to climb anything without them. Having these on a sport climb let me clip a good bolt on the next route over when mine was clearly too rusty to be trusted. You need to have at least 2 with you, and you don’t have to extend them if you need a short quickdraw. |
Screw Gates
- Types of climbing: Sport and Traditional
- Description: A carabiner that locks so the gate cannot be opened
- Purpose/Use: Prevents gates from accidentally opening such as against edges when loaded in a direction
- Buying Guide:
Carabiners come in different shapes and sizes which can be used for different purposes. When you’re starting out you’ll probably just want a few basic ‘D’ shaped and ‘HMS’ shaped carabiners. This will get you through most stances, top rope anchors, and sport climbing cleaning. You may also want to get one very very large HMS that’ll take 3 clove hitches for convenience, but it’s not a must. Further, getting big solid
Additionally, the locking mechanism can either require manual screwing or snap into place automatically. I personally use the manual type, but if you’re someone who might forget to do them up then get the autolockers. It’s worth a mention that dust and dirt can cause your autolockers to jam up, so this is something to be aware of. All the added security of locking carabiners make them an essential bit of gear for keeping you safe while rock climbing.
| Carabiner | Type | Comment |
|---|---|---|
| Black Diamond HotForge Screwgate | D Shaped | These basic ‘biners are great for your every climbing need. Strong, sturdy, and durable. |
| DMM Shadow Screwgate | D Shaped | The DMM shadow are again a personal favorite and the bright colors have always helped me organize my anchors. |
| Black Diamond RockLock | HMS | This big beefy HMS will be a hard wearing but heavy. However, a great place to start. |
| Petzl Attache 3D Screwlock | HMS | Light weight, thanks to the I beam construction. This HMS should squeeze out 2 clove hitches and has a great bit of paint that lets you know when it isn’t screwed up properly. |
| Petzl William Screwlock | Big HMS | This big boy is as easy to handle as it is easy to get on 2 clove hitches and have room left over. |
| DMM Big Boa | Boa / HMS | This is the boa I use and I tend to squeeze on 3 clove hitches with a 9.8mm single rope for some bomber-anchor building. |
Personal Tether
- Types of climbing: Sport
- Description: A sling make of dyneema or nylon, and comes in a variety of shapes and sizes
- Purpose/Use: Used to attach yourself to fixed gear and rig rappels with
- Buying Guide:
This comes down to personal preference as the various options come with their own pros and cons. I personally clove hitch the dynamic rope I’m tied into as often as possible. However when the moment calls for it I do have a 120cm sling, from Edelridge. I like this because it’s 12mm thick so it feels a bit more sturdy and is long enough that I can easily adjust the length with a knot. However, there are loads of other options, from dedicated quick adjust tethers to a couple of quickdraws linked together.
| Tether | Pros | Cons |
|---|---|---|
| Black Diamond Link Personal Anchor | Many fully rated loops allow for quick selection and attachment, plus the tail allows you to clip to a backup if you so desire. | This can still be shock loaded. Many loops can be fiddly and are not fully adjustable. |
| Metolius Personal Anchor | This chain features one more loop than Black Diamond’s, so it does offer the benefit of reaching just a bit further. | Again still can be shock loaded, and perhaps is one loop more fiddly to use. |
| Edelrid 6mm Aramid Cord Sling | Simple and straightforward. Tough and can be used like any other sling so is more versatile than purpose built systems. Plus there is more dynamic stretch, which will likely have more give in a shock load. Additionally, this sling is stiff and great for threads when you trad climb. | It’s round profile makes it harder to rack comfortably. Can still break under shock load |
| Petzl Connect Adjust | This quickly adjustable connector is great for sport climbing. Single or multi-pitch climbs — this has you covered. It’s fully dynamic, so should hold you if you shock load it. | Doesn’t have great versatility. The adjuster has slipped under 4.4kn testing by Black Diamond. |
Ropes
- Types of climbing: Sport and Traditional
- Description: Dynamic ropes or outdoor climbing get a little more complex. They can be weather treated; single, half and twin rated; and static, semi-static, or dynamic.
- Purpose/Use: Keep the climber safe during a fall. Hauling gear up a wall. Rappelling post climb. Rigging solid anchors.
- Buying Guide:
Half ropes are rated to take a full fall, however, they sacrifice weight for durability. There are benefits to having 2 fully rated ropes with you though. If something were to happen to one of the ropes you’d still have one fully functional one, and you can do big long rappels. Additionally, I recommend getting 2 colors for quick differentiation.
Single ropes easier to handle and less risk of a tangle. However, the problem here is you only have one, which means (unless you’re packing a tagline) half length rappels.
Lengthwise 60 or 70m is what I go for. This gives you the ability to climb long pitches with a little bit left over for the anchor.
| Rope | Type | Length | Comment |
|---|---|---|---|
| Edelrid Boa Eco 9.8mm | Single rope | 70m | Perfect rope for dry summer climbing |
| Mammut Crag Dry 9.8mm | Single rope | 60m-70m | Great treated rope for dry and wet days on rock, alpine, or ice climbing days |
| Edelweiss Performance 9.2mm | Single, Half, and Twin rated | 70m-90m | Thin triple rated rope great for durability and all weather conditions, but can be used as a half rope for more confidence |
| Black Diamond Dry Rope 8.5mm | Half rope | 50m-70m | On the thicker side for a half rope with durable dry treatment for unexpected showers |
Prusik
- Types of climbing: Rappelling, Sport, Traditional, and Rescue
- Description: A loop of accessory cord either 5mm or 6mm thick, tied with a double fisherman’s knot.
- Purpose/Use: Super versatile in its use, from protection, to an emergency sling, a good prusik can be used in a load of situations. However, it’s main use is as a third hand.
- Buying Guide:
Simply put you need about 1.5 to 2m worth tied into a loop. 5mm cord will grip the rope firmer while 6mm is more likely to slip. I typically carry 2 loops as a minimum and these stay doubled over and girth hitched to one of my rear gear loops.
| Option | Comment |
|---|---|
| Beal 5mm cord | I personally prefer this thickness for my half ropes and it works great on singles too. |
| Beal 6mm cord | This will also work good with most ropes and I do prefer it for when I’m climbing on a single rope. |
| Beal 5.5mm prusik | This is down to preference. It comes with the benefit of a 22kn rating which is far more than your standard cord. However, this is reflected in the price. |
Protection
- Types of climbing: Traditional
- Description: Passive or active metal work typically consisting of nuts, hexes and cams.
- Purpose/Use: Placed into cracks and constrictions in the rock face to protect the climbing just as a bolt would on a sport climb.
- Buying Guide:
By the time you’re purchasing your first rack I highly doubt you need me to tell you what’s what. But, I do have some thoughts on the matter. Color coordination is a must, as you get familiar with your gear you can eyeball the right size and color before you’ve even got the rack in your hand. Rack on keynose carabiners, this will stop thin wires getting snagged on the nose as you’re taking them off.
| Protection | Comment |
|---|---|
| DMM Wallnuts | My personal favorite shape and size of nuts. I’ve found the wallnuts from DMM to fit in a range of placements, the colors are lasting, and the wires are strong and durable. |
| DMM Offset Stoppers | I tend to stick to one brand when it comes to passive protection. That way the colors all match up. I always find a spot for a good offset on all my climbs, so I never leave the ground without them. |
| Black Diamond’s Wired Hexentrics | I enjoy the smaller sizes of these on wires as hexes can be used as stoppers and for their camming action under the right circumstances. Plus, the wires make them easier to place. |
| DMM Torque Nuts | I have these hexes from DMM on slings which give them another level of versatility for slinging spikes. So these will make up the larger sizes of passive protection on my rack. |
| Black Diamond Camalot C4 | The all American classics are an essential bit of gear for any rock climbing enthusiast. While I personally prefer the thumb stud and extendable sling of the DMM Dragons, others rave on about the Camalot’s thumb loop and durability. |
| Camp Tricams | These interesting looking pieces of gear can certainly supplement the experienced climbers rack. With great utility in horizontal cracks, these can be great if you know how to use them. |
| Smaller protection | Smaller protection can be handy when you’re climbing a featureless slab with only a few tiny cracks. Just enough space to squeeze the smallest bits of gear like the DMM Peenuts, Wild Country Friend Zeros, or the Camalot Z4s. |
Nut Tool
- Types of climbing: Traditional
- Description: A thin piece of metal with a small hook on the end.
- Purpose/Use: Used to remove protection than is jammed in cracks. Resist the urge to use the hook to pull things out. Instead, rest the tool against the nut in the direction you’d like to hit it (typically up). Then using a stone, large hex, or your palm, hammer your nut tool like a chisel.
- Buying Guide:
The trick to a good nut tool is a combination of strength and slimness. If the nut tool is too fat to fit into thin cracks you’ll lose lots of gear. After you’ve ticked those boxes it’s all down to personal preference.
| Nut Tool | Comments |
|---|---|
| Wild Country, Metolius, and Black Diamond | All these nut tools are one in the same. They feature a built in clip to help you rack the tool without needing an extra carabiner, and they have cut outs to reduce the weight |
| DMM Nut Buster | Although it lacks the built in carabiner, this tool from DMM features a large rubber handle so it can be hit with your palm. Further, hidden under that rubber is a 17mm spanner for tightening any bolts you come across. The cut out next to that will open a beer — Trust me. |
Crag Pack
- Types of climbing: All types of climbing
- Description: A backpack, but with little details that make your life more enjoyable.
- Purpose/Use: Hauling all your kit to the gym, or the crag.
- Buying Guide:
Unless you’re climbing at road side crags and like carrying everything if shopping bags, a pack is essential for getting you rock climbing gear from A to B. Buying a pack is always overwhelming due to the ungodly amount of choice. Just think about how much stuff you need to carry, then add an extra 5 liters for layers during the winter. I recommend personally getting a pack big enough to put the rope in your bag, keeping it dry and safe in unexpected weather is always nice. So you’ll probably want a city pack for heading to the gym (20-30L) and an outdoor pack for your big backcountry adventures (40-50L). I also try to make my city pack my multi-pitch pack, at the expense of looking a bit outdoorsy.
| Pack | Size | Comment |
|---|---|---|
| Patagonia Cragsmith Pack | 32L or 45L | This firm favorite amongst many climbers comes in different back lengths just to suit you. As the name suggests this is more of a cragging pack, but is at home on light weekend getaways. |
| Black Diamond Street Creek | 24L | This pack is at home in the city with ample room for your shoes, chalk, and harness. Plus it has a laptop sleeve for all you business folk. |
| Black Diamond Pipedream | 45L | Wait a minute… This isn’t a pack, it’s a pad. NO. It’s BOTH! The perfect crag pack for when you’re not confident getting to the first clip. |
| Arc’teryx Alpha AR | 20L, 35L or 55L | This is a good pick leaning towards everyday and multi-pitch use. Plus it is a great alpine bag with ice axe storage. |
| Black Diamond Stone | 45L | Classic do-all mountain bag. I use something to this effect and I have used it for everything imaginable. Airline travel, running to the shops, weekend cragging, trip to the gym, couch surfing, multi-day hiking, and even as my everyday bag for university (albeit whilst getting weird looks). |
Knick Knacks to Pick Up — The Extras
Whilst you don’t need any of these things they can be nice additions in the right circumstances. To some they are essential bits of gear that they don’t go rock climbing without. Each with its own benefits, it is entirely up to you if you use these or not.
Gear Sling
- Types of climbing: Traditional
- Description: A piece of webbing with a thickened shoulder pad. Sometimes loops are sewn in to keep different gear separated.
- Purpose/Use: Carrying your protection up a climb and allowing you to do quick exchanges with your partner.
- Buying Guide:
You’ve really just got to choose between single and double sided ones. The double sided will let you carry more gear in a more organized manner. However, if you’re only taking up an extra set of cams and you’re still racking on your harness gear loops then a single sided bandoleer will likely do. The gear sling, while not so essential to all climbers can quickly solve many rock climbing gear transport and storage problems.
| Sling | Comment |
|---|---|
| Black Diamond Zodiac | This is the gold standard with plenty of space and loops for all your gear. |
| Metolius Multiloop | The single sided sling does offer the opportunity to swing it out the way so it can be more convenient in tighter spaces. |
Belay Glasses
- Types of climbing: Anything that involves looking up
- Description: Fun little prismatic lenses or mirrors that point upwards.
- Purpose/Use: These help you see your climbing partner without straining your neck.
- Buying Guide:
A lot of these will set you back quite a bit, but I’ve never seen any reason that they really should. For this reason I think a pair of YY Vertical do the job just fine. However, if you did want to splash out a little bit the Metolius Upshots are the way to go.
Belay Gloves
- Types of climbing: Anything with ropes
- Description: Leather palmed gloves.
- Purpose/Use: Protect your hands from rope burn and allow you top handle the rope better.
- Buying Guide:
Depending on what time of year you climb you’ll have different requirements for keeping your fingers safe and sound. If you climb year round indoors and outdoors then I would get a pair of fingerless gloves like Black Diamond’s Stone gloves and a pair of insulated gloves like OR’s StormTracker Gloves. This should give you year round coverage unless you’re going somewhere really really cold any wet in which case Rab’s Guide 2s are a great benchmark.
Crack Gloves
- Types of climbing: …Crack…Climbing
- Description: A rubber or leather backed glove that is lightweight and breathable.
- Purpose/Use: Protects the back of your hands from abrasion when jamming.
- Buying Guide:
There aren’t too many options on the market, but if you’re doing lots of crack climbing the convenience of gloves become very obvious. These gloves are going to get put through some tough times as you grate them against rough stone. So, durability is important when picking the right gloves. Unfortunately, most gloves have issues in this department, with many reviews complaining of tearing at stitching or wearing through the backing. Yet, these can quickly become an essential go-to of your rock climbing gear get-up.
| Gloves | Comment |
|---|---|
| OR’s Splitter Gloves | Having personally tried these I can safely say they work, and felt sturdy enough to tighten the wrist strap well. |
| Black Diamond’s Crack Gloves | These gloves are reviewed as being great when you’re using them, but too flimsy to really tighten the wrist strap without breaking it. |
| Ocun’s Crack Gloves | These gloves come with a bit of padding for your knuckles, however this will come with a bit of size increase to your hand jams. A solid choice that I often see at the crag. |
Additional Resources for Going Climbing
What to Bring
Everyone’s checklist
- Clothes - There’s no best outfit for climbing and figuring out what to wear is always a little tricky when you’re just starting. Shorts or trousers? Honestly, just dress for the temperature and any sportswear will do. Although protecting your knees is often a good idea, and going from climbing to casual without changing in a good pair of trousers can save you space in your gym bag. Honestly as long as it’s stretchy you’ll be fine, but if you can get a pair with a diamond gusset like Hippy Tree’s Sierra Pants or Patagonia’s Venga Rock Pants, you won’t regret it. Shorts wise, anything baggy or stretchy would also be fine, but I have noticed the cool kids do like to wear Prana’s Mojo Shorts. IF IT IS YOUR FIRST TIME - BRING SOCKS (those rentals aren’t getting any newer)
- Water - Any respectable athlete will tell you that staying hydrated is really important, and any climber will tell you there are 3 options for bottles, all of which you must plaster in stickers. They are: The old reliable BPA free Nalgene, the elite Hydroflask, and finally the eco friendly Klean Kanteen.
- Snacks - There is quite frankly nothing better than a little nibble when you’ve been trying hard, but a full meal will probably derail your journey on the send train. Personally, I always carry some sort of cereal bar to keep me going mid session such as Cliff Bars or RXBARs.
- Tape - I’m talking good sticky zinc tape. Offered by a host of climbing brands and easily bought at your local gym, tape is used to save some skin or seal up that flapper. Metolius makes my favorite, but there’s plenty of options out there.
- Hand Balm - There’s plenty on the market, but I’ve had the same nub of climb on for a couple of years and it’s doing me good. Although, I did recently get a tub of Joshua Tree and that stuff really works.
- Nail clippers - Now this is super underrated and honestly the last thing you want is to be the one making horrible scratching noises every time you crimp. Additionally, long toenails can make squeezing your feet into already tight climbing shoes all the more painful, so be sure to pick up a pair and throw them in your bag.
Established climbers checklist
- Climbing Shoes - The staple of all climbing, a great selection can be found online here. Picking the right shoe can be really tricky, but look out for our future advice article.
- Chalk Bag - Sweaty hands are the bane of a climbers existence. We carry chalk to quickly deal with those sweaty tips and up the friction. Chalk comes in balls, loose, bricks, or liquid, whilst the bags come in all shapes and sizes. Boulderers might prefer ‘buckets‘ to avoid losing your chalk in a tumble.
- Harness - These are much of the same, but some are particularly light to help you hit the higher grades, though they often end up losing a couple of features. Some of the best do-all harnesses include Petzl Adjama, Black Diamond Momentum, and Mammut Sender Fast Adjust which feature enough gear loops for getting into more complex climbing, as well as adjustable leg loops for when you need to layer up.
- Belay Plate - There are really only 3 factors to consider when choosing one of these; what you learnt to use, where you want to take your climbing, and the cost. Standard ATC, Guide ATCs and Assisted Braking Devices all work, but it’s really all down to personal choice. The flexibility of guide plates make them a favorite amongst those looking transfer their knowledge outdoors, while assisted devices can feel more secure to beginners.
- Brush - You only need a small personal brush for when the chalk has built up and make the holds smooth, a lot of gyms do provide them so you don’t need one. Saying that, why not accessorize your chalk bag with a colorful brush like these Lapis Boar hair brushes!
- Rope - When you get to leading you’ll probably want your own rope, but if you’re climbing indoors avoid making the ‘I need a light skinny rope to send’ mistake. You’re going to be running loads of laps, so get a good thick dynamic rope like this 9.9mm aptly named Workhorse rope from Mammut or even a fat 10.2mm from Black Diamond that’ll stand up to heavy gym abuse. Also, since you’ll be indoors you can skip any dry treatments that push the price upwards.
- Backpack - You’ll need a gym bag of sorts to help you lug all this around, and how big you go is totally up to you and what you’re going to be carrying. If you’re just hitting up the bouldering gym, or don’t mind wondering around with the rope on show, then a good 15-20L bag like the AR 20 from Arc’teryx is ideal. Plus it’ll suit all your future fast and light days. Going up to 20-35L, will let you start packing those extra layers and maybe get the rope inside your bag too. At this size Patagonia’s Crag Smith is full of features and makes a great all round day pack!
Post send and extras
- Belay Gloves - By no means do you need belay gloves, but some people like to keep their hands a little safer just in case (some people do let go if the rope starts to burn their hands). The trick to these gloves is leather palms to achieve the right friction. Outdoor research make a great set called the Fossil Rock Gloves, and they’re fingerless for both breathability and style points.
- Crack Climbing Gloves - If you’ve been inspired by the Wide Boyz, but are tired of ripping tape off the back of your hands then a pair of the new Black Diamond Crack Gloves or Outdoor Research’s Splitter Gloves could be for you.
- Skin File - If your calluses are getting a bit dry and you’re starting to get the equivalent of a hangnail in the middle of your finger, this is a sure fire way to end up with one big flapper. You can file it down with one of Climbskin’s portable solutions and avoid that week of taping up an avoidable mistake.
- Shoe deodorant - Climbing shoes get notoriously smelly, lucky I’ve got 2 great solutions for you - Boot Bananas and Disinfectant spray, I genuinely use these and they work a treat and when I run out the shoes stay out my bag.
- Acupressure Ring - Who knows if these work or not, but I’ve been using one religiously on a pulley injury and I think it’s helped a lot. They’re pretty cheap, so why not?
- Long Term Antiperspirant Treatments - Good skin care is important to keep you in top climbing shape. Rhino Skin Solutions are a great brand, endorsed and used by all the big names in climbing, with the big benefit of reducing sweating. I mean the less time you’re hanging around chalking up, the more energy you’ll have to send. The job lot Skin Abuse Pack and their Tip Juice might help you push your grades sooner.
Related Articles
