Updated November 1, 2025
Did you know that just a short trip from New York City, you can find incredible hiking trails and amazing nature areas? I was floored when we read about some of the beautiful and challenging hikes near NYC, so I decided to try a few of them out. The Breakneck Ridge trail was one that I was most interested in tackling because it boasted spellbinding views of the Hudson River and the mountains of the Hudson Highlands. What I found when I finally hiked Breakneck Ridge was a sense of surprise at how challenging and beautiful the trail was, even though it was just over an hour from the city.
Thinking of doing this hike yourself? I detailed out my entire Breakneck Ridge hike experience so you know exactly what to expect from this fun, thrilling, and challenging hike in the New York City area.
Breakneck Ridge Trail: The Basics
Located in the Hudson Highlands State Park reserve, the Breakneck Ridge trail is popular with New York locals as well as those living in New Jersey and upstate. Unlike many of the urban trails in the city, Breakneck Ridge is a difficult hike that involves a lot of tricky scrambling, so it’s great for experienced hikers wanting to try something new without going too far away from the city.
While you can absolutely drive to the trail head, the beauty of this hike is that it is accessible from New York City by public transportation. You can take the MTA to the Breakneck Ridge train station and then easily walk to the start of the trail. For this reason, the trail often gets very crowded on weekends and holidays during the warmer months of the year.
Here’s a quick snapshot of the Breakneck Ridge trail:
- Trail Distance: 2.5 to 3.5 miles
- Elevation Gain: 1,250 feet
- Difficulty: Strenuous
Things to Know Before Doing the Breakneck Ridge Hike
This trail is very well-marked and is pretty self-explanatory, but there are a few things I wish I knew before embarking on the Breakneck Ridge loop.
- There are two versions of the Breakneck Ridge trail: the short and the classic loops. If you’re crunched for time, the short loop is about 1 mile shorter and takes ~2 hours to complete. The classic loop is said to take ~3 hours. There are a number of other trails that branch off from the main Breakneck Ridge trail that you can take to extend your trip even further.
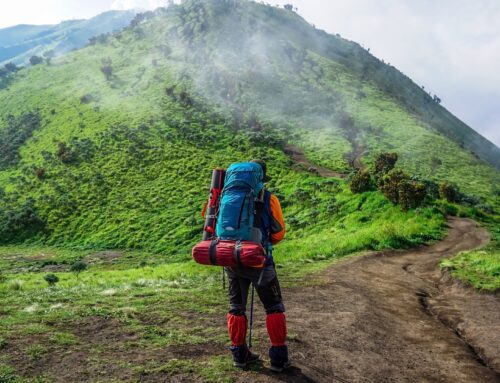
- You will use your hands a LOT in the beginning. This trail is 100% scramble for the first hour or so, and you’ll need to use your hands and feet to scale the cliff. Because of this, we recommend packing light for the hike and only carrying what you absolutely need.
- Fall is the best time of year to do this trail. I might be biased, but fall was an absolutely perfect time to do the Breakneck Ridge trail. The air was cool, the breeze was strong, and the fall colors were starting to paint the valley in shades of warm colors.
- Breakneck Ridge isn’t very dog friendly. The trail technically permits dogs, but after hoisting my 45-pound husky puppy up the side of the cliff for an hour, I’d definitely recommend leaving your dog behind. I met two couples who had to turn around because their dogs couldn’t climb it. Unless your dog is a) a monkey or b) a bird, I’d recommend leaving him or her at home.
How to Do the Breakneck Ridge Trail: Our Review
Getting to the Trailhead
When you arrive near the trailhead, you’ll notice that there are several cars lining the main street (as of publication in September 2020, the trail’s parking lot was closed). Find a spot to park near the Breakneck Ridge trailhead, which is just before the tunnel. Beginning on the side of the road closest to the railroad tracks, the trailhead looks like this:
You’ll begin the Breakneck Ridge hike here, where sets of rock “staircases” quickly bring you up a sharp ascent and turn into more challenging stone scrambles. Be sure to take a photo of the trail map at the beginning so you know which routes to follow, as there are several trails that branch off from the main Breakneck Ridge trail.
Here is also where you’ll choose your route. There are three: the Short Loop, the Classic Loop, and the trail to the town of Cold Spring. We opted to do the Short Loop because we arrived about 2 hours before sunset and didn’t want to be hiking during the dark. Anyway, all of the trails start in the same place.
The Beginning of the Hike
The start of the Breakneck Ridge trail is, at once, the most thrilling, the most scenic, and the most challenging part. The trail very quickly ascends into a super steep grade, and it becomes 99% scrambling. Yes, this means you’ll be using your hands and feet and flinging yourself over rocks a lot. Poles won’t help you here, they’d probably just get in the way of your ability to hold into things, so I’d recommend either leaving them behind or strapping them to your backpack.
I went with my husky, Rory, and pretty quickly realized that I’d have to hoist her up a good number of the rocky scrambles, as even her strong legs and crazy jumping ability couldn’t bring her over some of those challenging areas.
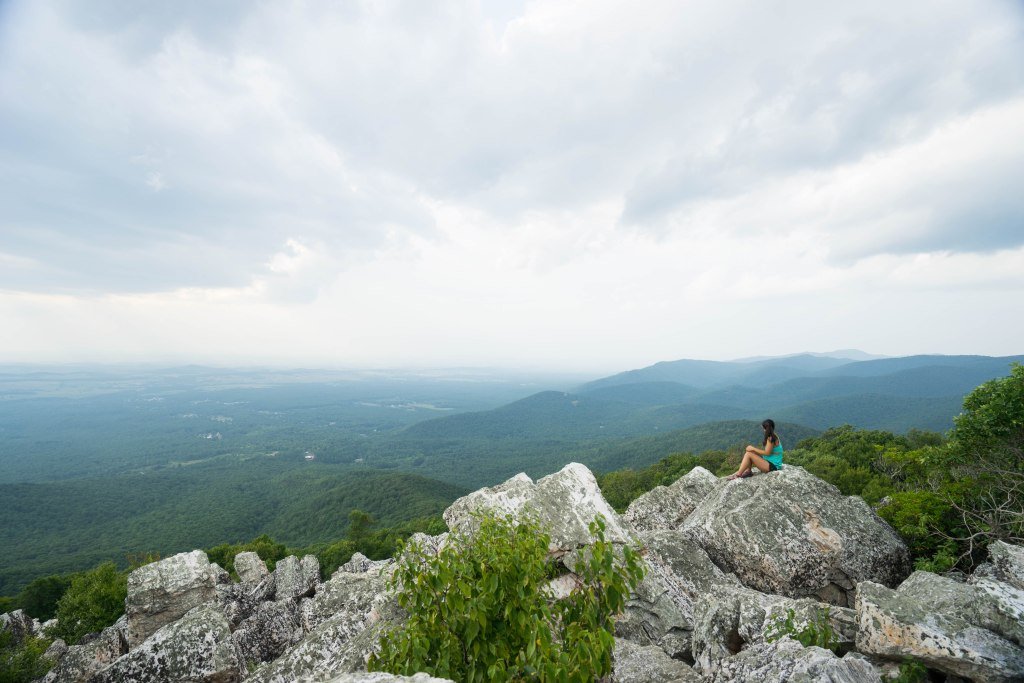
After several minutes of sweaty, dusty scrambling, we made it to the first “summit,” the flagpole area. The views from up here were breathtaking in the setting sun, and the light breeze was a real treat after scrambling and carrying my 45-pound dog up the mountain. From here, there are sweeping views of the Hudson River and the surrounding mountains, which were starting to turn golden in the setting sun. The whole scene looked somewhat like a fjord in the Nordics.
Reaching the Next Viewpoint
After catching our breath at the flag pole viewpoint, we continued upward. The rocky scrambles were still difficult, but slightly less so. After a little bit of hiking, there was an alternate route to the left that was marked as an “easier ascent.” The main trail continued onward to the right. Given the difficulty of getting my dog, Rory, up the mountain before, we opted for the easier ascent.
Finally, we made it to the second scenic viewpoint, which is an even higher and more beautiful view than the flag pole area. We sat here for a while, taking selfies and enjoying the view.
After this viewpoint, we found another wonderful detour from the trail that had views of the Hudson and some really beautiful fall foliage that was just starting to turn. I’d highly encourage you to spend some time up here — the views all around are absolutely outstanding, and if we had more daylight, I definitely would have stayed up here longer.
The Short Loop
As you continue on from the clifftop summits, you’ll see a yellow marker to the right signaling “Undercliff Trail.” The signs also very clearly say “Breakneck Ridge Short Loop” with an arrow pointing this way. If you’re doing the short loop, take a right here and continue down the stone steps for a while.
During this section of the hike, you’ll see beautiful rock formations and cliff faces, and the descent is much more reasonable and gradual than the scrambling rock passes before. This whole section is shaded and forested, and is quite a nice reprieve from the sweaty, exposed areas on the other side of the cliff face.
Eventually, you’ll reach a small, abandoned cabin near a creek. Cross the creek and turn right to take the green blazed trail. Again, there’s a very obvious sign that says “Breakneck Ridge Short Loop” with an arrow. From here, the trail is fairly flat with only a few occasional steeper areas. Enjoy this easy path - you’ve earned it. You’ll pass a few more historic structures on the way down.
Finally, you’ll reach a turnoff to the right that has red blazes. Again, there are signs signaling the “Breakneck Ridge Short Loop” back to the tunnel. Take this path all the way to the road, where you’ll pass through the tunnel and arrive back at the trailhead where you started.
The Classic Loop
If you’re tackling the classic Breakneck Ridge Loop, you’ll continue forward with the white blazes (instead of turning right toward the yellow blazes in the last section). You’ll continue gradually upward to another summit, then descend down through the trees. Eventually, you’ll hit a fork in the trail where there are red blazes to the left. Take this trail until you reach the yellow blazes to the left, which you will follow all the way to the parking area. Again, there is ample signage marking the “Breakneck Ridge Loop” trail at each turning point.
Additional Resources for Hiking in New York
What to Bring
- Breathable hiking clothes - For warmer hikes, you’ll want to wear a sweat-wicking shirt and breathable pants, like these Patagonia hiking shorts for men and women. For cold-weather hikes, we recommend dressing in layers, including merino wool baselayers for men and women, a down puffer jacket for men and women, and a Northface waterproof outer shell for men and women (a must for hiking in Seattle). And don’t forget a pair of the best women’s and men’s hiking socks!
- Trekking poles - You won’t need these for every single hike, but we suggest throwing them in your car just in case. We recommend the Black Diamond Trail Ergo cork trekking poles, which are lightweight, easy to transport, and durable.
- Water bottle - Having water available at all times is a huge must. To limit disposable plastic, we recommend bringing your own refillable water bottle. We’re obsessed with Hydro Flask water bottles because they keep water cold for hours.
- Sunscreen and bug spray - Sweatproof sunscreen and DEET bug spray can help you avoid sunburn and bug bites, two of hiking’s most annoying after-effects. Our favorite kind of sunscreen is Sun Bum, as it is free of harsh chemicals and safe for marine life, including coral reefs.
- A brimmed hat or cap - The sun can be brutal in open hikes, so always pack a brimmed hat or cap for day hikes in the sunshine.
- Emergency blanket and first aid kit - We’d strongly recommend bringing a first aid kit and a lightweight emergency blanket on every hike. Why? Because the unfathomable can happen, and it’s always best to play it safe.
- Durable day pack - A durable day pack is the perfect spot to stash all your hiking gear. While any backpack will do, we recommend the Osprey Tempest 20 or the Talon 22 day packs because they’re comfortable and breathable for long hikes. For more information, check out our best day packs for any terrain guide.
Wondering what exactly you should pack for your next hike? Visit our Complete Day Hiking Packing List for our full list and our top gear recommendations.
